Introduction
UNDA.Xplora is designed to make learning electronics simple and hands-on. You can start by building and exploring ready-made, pre-compiled projects without needing to write or compile code.
This approach allows you to focus on:
- Building circuits and understanding breadboarding.
- Understanding how components work and how to wire them correctly.
- Observing real outputs and experimenting with your circuits.
As you become more familiar with electronics, you can progress to coding and creating your own projects.
Xplora Projects
UNDA.Xplora come with 20 pre-compiled projects that are identified by a name that describes what it does-for example, Flashing Light, Light Switch or Weather Station.
The kit also offers the ability to expand more projects and they will be made available over time.
Projects Main Menu
The Projects Main Menu has a list of the pre-compiled projects that the user can browse and select to build a project.
We will explore the Project Main Menu in more details below, but first follow these steps on how to open it:
- Use the navigation buttons to move to the Projects Menu Icon on the kit's Main Menu
- Press the center button to open it.
The Project Main Menu consists of the following parts:
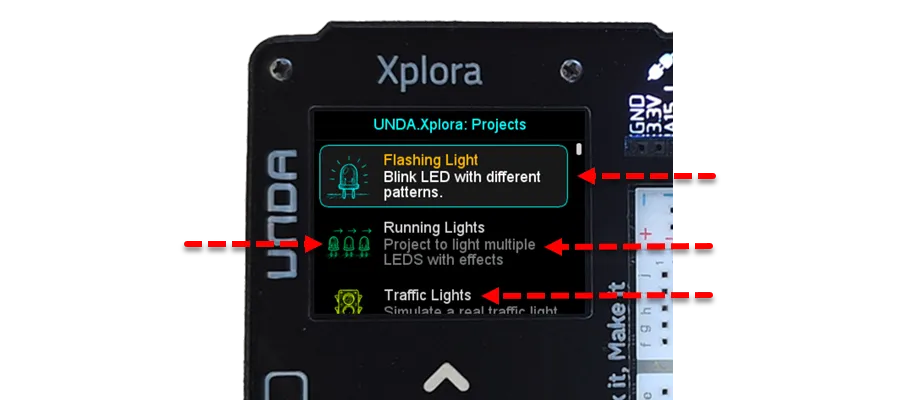
It highlights the current selected project. Use the center key to open the selected project.
Shows the icon representing a specific project.
Provides a brief overview of what the project is about.
Gives information about the name of a project.
When navigating through this window, use the following navigation buttons:
- Up/Down : Moves the selection one project up or down.
- Left/Right: Moves the selection to the next or previous page. A page here means the display of three projects.
- Center - used to selects an option e.g, open selected project.
- Xplora - used as a back button.
Selected Project Window
Now that we have gone through what the Project Main Menu, let's look at the Project Window that appears when you select a specific project such as, Running Lights Project.
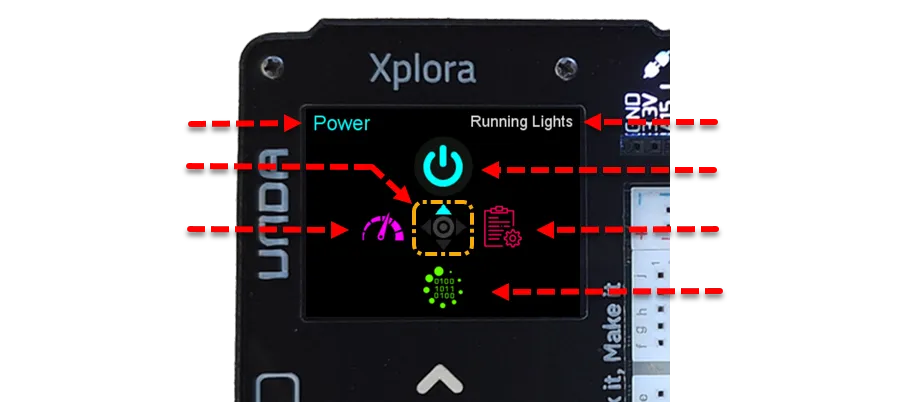
It displays the name of the selected menu option.
Shows the name of the project that you have selected and are currently viewing.
When selected it turns the breadboarding power on or off
Provides learning resources for the selected project, including notes and step-by-step guides.
Loads the pre-compiled project code directly onto the Xplora Kit once you have finished building the project.
Opens the Play Section, where you can interact with the uploaded project and select available actions or effects.
Shows the navigation controls that indicates which button to press to select a given option.
Each icon in the Project Window has a specific function. The sections below explain what each icon is used for.
Power
Using the Centre button, the user can use the Power Option to toggle between turning the breadboarding power on or off.
The backlight LEDs on the breadboarding pins section will help to indicate the current power state:
Power ON: The backlight LEDs turn red.Power OFF: The backlight LEDs display the selected theme color, such as lime green.
Always turn the breadboarding power off before placing, removing, or rearranging components on the breadboard.
Build
The Build Section provides resources that you need to understand and build the selected project. Use the center button to select and enter the Build Section Window.
The Build Window has the same layout for every project, with only the project-specific content changing.
Check the image below for a preview of the layout of the Build Window
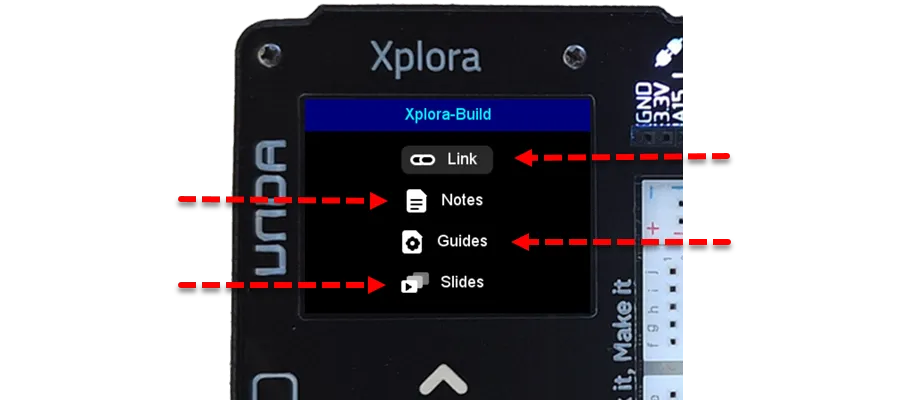
Provides access to the project's online build tutorial through a QR Code that can be discussed or URL link for access.
Contains brief overview of the project and highlights of what you will learn from a specific project.
Provides step-by-step instructions for building the project on the breadboard, including components needed and relevant tips about breadboarding.
It contains project-related media, such as images and videos, to support learning and understanding of projects.
In the sections below we will look at what each option in the Build Window contains and what it is used for.
Link
The Link section provides a quick way to access the project online. It includes a QR code that can be scanned using a phone or tablet, allowing users to open the same project in a web browser.
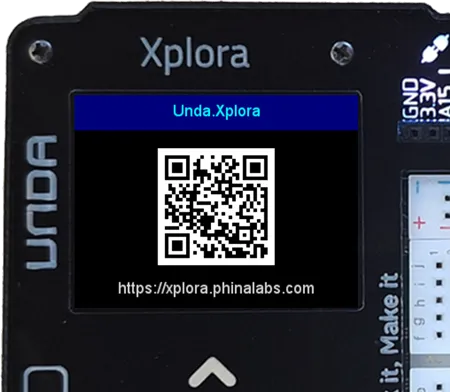
Link window on the kit displaying the QR code for a project.
The online version provides more detailed instructions and additional information that may not be included in the project on the kit.
Notes
The Notes section provides a quick introduction to the project, helping you understand what you are building before getting started. It includes:
- Project Overview - A brief description of what the project does.
- How It Works - An explanation of how the project operates.
- Key Concepts - The main concepts you will learn through the project.
- Applications - Examples of how the project can be applied in real-world situations.
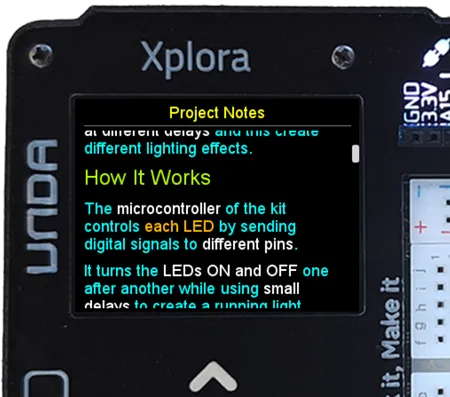
Snippet of Notes Window for the Running Lights Project.
In this window, use the Up/Down or Left/Right navigation buttons to move through the notes, and long-press the Centre button to toggle between wrapped and unwrapped text.
Guides
Open the Guides Option
From the Project window, open the Build Menu and then press the Down button to navigate to Guides Option. Once selected, then press the Centre button to enter the Guides window.
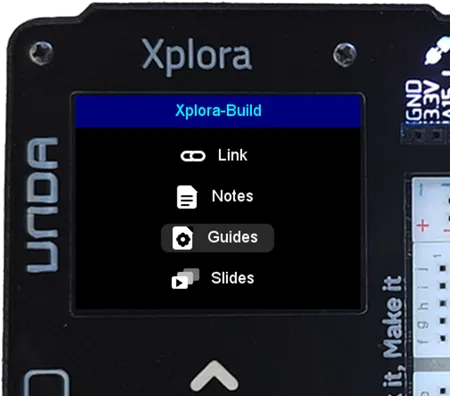
Build Menu Window for the Running Lights Project.
Confirm the Components Used
Use the Up/Down buttons to scroll through the list as you check and collect the components you will need for the project.
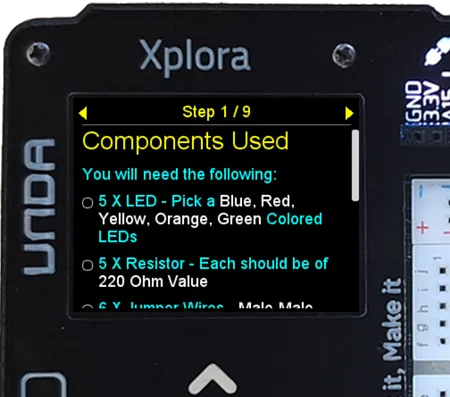
Snippet Of Components Used Step for the Running Lights Project.
This is the first in every project guide, although the components listed will vary depending on the project.
Follow the Build Instructions
Follow the step-by-step instructions to place the components on the breadboard and make the required connections to build the circuit. Each instruction includes a Wiring Overview that gives a quick summary of the circuit connections for that step.
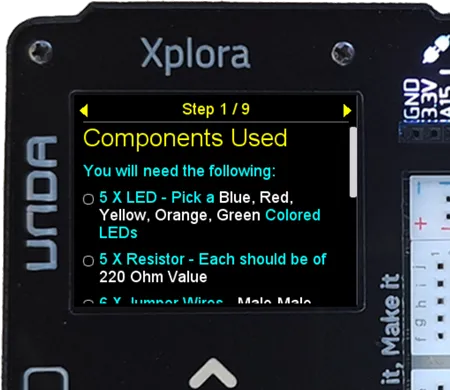
Snippet Of Build Instruction Step for the Running Lights Project.
Check Circuit Summary
Once you have completed all the build instructions, the next step is the Circuit Summary. It provides a complete overview of the circuit connections in a table, showing where each component connects so you can review the entire circuit before powering it up.
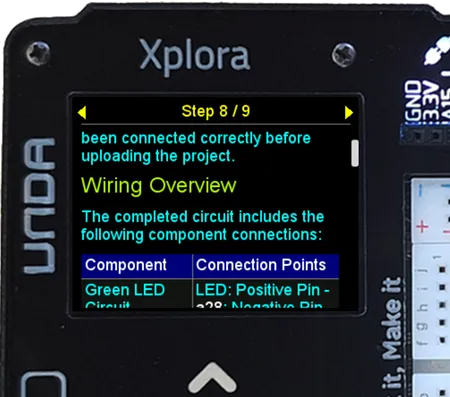
Snippet Of Circuit Summary Step for the Running Lights Project.
Follow Upload Steps & Expected Result
The final step takes you through the upload process and explains how to run the project on the kit. It also includes the Expected Observation, describing what you should see when the circuit is working correctly so you can compare your result with the expected outcome.
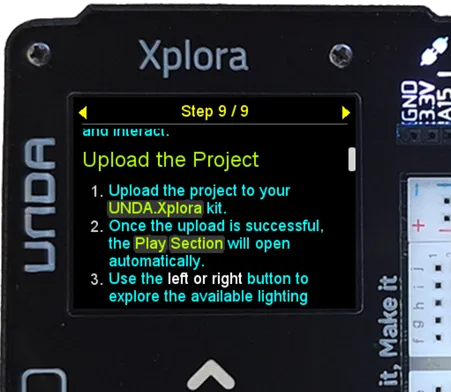
Snippet Of Circuit Summary Step for the Running Lights Project.
In this window, use the Up/Down buttons to scroll through the selected step, while Left/Right moves to the previous or next step. Long-pressing the Centre button toggles between wrapped and unwrapped text.
Upload
Uploading a project simply means sending the pre-compiled code to the kit's microcontroller, so it can control the circuit you have built.
To upload a selected project's pre-compiled code follow the instructions below:
- Use the down navigation button to move to the Upload Icon and press the center button to open it and then wait for the Upload Window to pop-up.
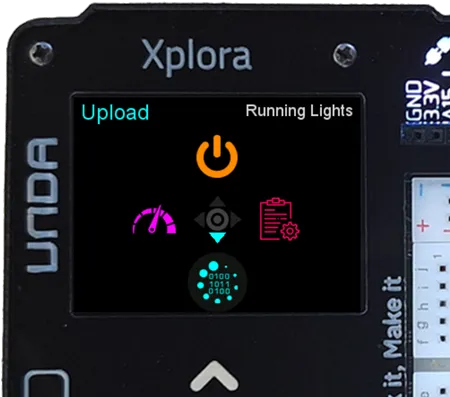
Project Window showing the upload icon selected
- On the Upload Window you will get two options:
- Upload the uPy Script - Upload a pre-compiled MicroPython Script of the selected project.
- Flash Binary - Uploads a pre-compiled firmware bin file for the selected project.
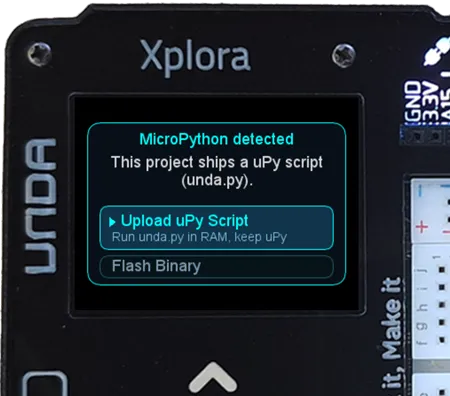
Upload Window showing the available upload options
When uploading Project Firmware (unda.bin), a pop-up window opens that prompts you to erase MicroPython from memory. Press the center button to proceed with the upload.
- Use the up and down navigation buttons to scroll between the options and press the center button to select your choice. Wait for the project to finish uploading; once complete, it will automatically open the Play Section.
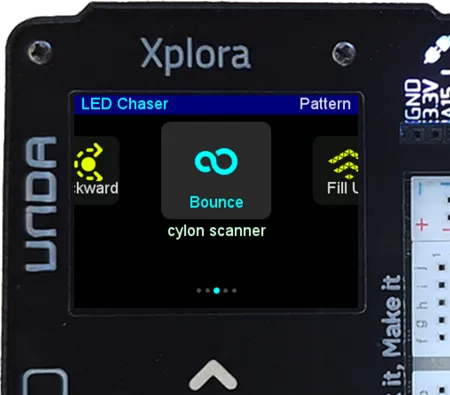
Play Window example for the Running Lights Project
Interact
The Interact Icon opens the project’s Play Section, where you can select different options and effects to interact with the project.
It also serves as a shortcut to the Play Section, as selecting it first uploads the project code and then opens the Play Section automatically.
Learn more about the Play Section:
Conclusion
The Projects Section provides a simple way to build, upload, and interact with pre-built projects on the Xplora kit. With the Build, Upload, and Interact options, you can move from building the circuit to running and exploring the project with ease.